Personalized cardboard cutout can be seen at nearly every major location, such as malls, fairs, convention halls, etc. It’s also known as “standee.” Generally, it is used as a prompt at birthday parties, weddings, or social gatherings.
The purposes of cardboard cutouts are not bound. There are movie cardboard cutouts, family cardboard cutouts, specific theme-based cardboard cutouts, life-size cutout, and people even use them at protest marches. Haven’t you seen a giant cardboard cutout at a rally?
Making a cardboard cutout is easy. Anyone could make one at home. Perhaps you have always wanted to create a personalized cardboard cutout of yourself as a DIY person. It could be for enjoyment or out of fantasy.
Generally, cardboard cutouts are large, so people think making them would be a time-consuming and challenging task. People don’t know that anyone can make it, even at home. It’s also light and cheap. The cost would be around $30-40 for each.
Equipment needed: for a personalized cardboard cutout.
It will be fun to make a personalized cardboard cutout if you have the right tools and equipment. Tune in to this section to find out the rest.
Equipment
- Cardboard or plywood (make sure its surface is flat)
- Glue
- Scissors
- Pen/Pencil
Start making a personalized cardboard cutout.
Step 1:
To jump right into this project, you have to start by taking a high-quality photograph of the subject. It’s always better to keep it simple. Try to take high-resolution pictures. There is no better tip out there than this one.
As cardboard cutouts come out 5-10 inches larger than you are, having a high-quality picture will provide you with excellent results; otherwise, the picture will be blurry, and it will ruin the look of your cardboard cutout. Adjust your image using Photoshop or any other photo editing software you prefer.
Remember, the resolution of your image has to be 150–300 dpi. Poor quality results will be caused by resolutions below 150 dpi.
Step 2:
Now for this critical part, it’s time for formatting after you decide on the photo you want to proceed forward with. There are plenty of ways to do this, both online and offline. Online, you’d get the necessary info.
If you’re doing this online, then Upload your photo, select your desired size, and it’ll provide you with a real-time preview of your inputs. Once you’ve finalized your design, download it. When you open the file, you’ll see that your whole picture is divided into separate portions on different pages.
You might find the picture of your head on two different pages. Other parts would be the same on other pages. Once you finish checking the images, hit print. You can also use Adobe Acrobat Reader.
If you go with this software, all you have to do is open your photo, select the print option, choose portrait or landscape, and print it out. It is as easy as it sounds.
For offline purposes, there are several other companies out there who’d do the task for you. Provide them with the photo you want for your personalized cardboard cutout, and they’d ship it to you. You can order one from Staples or Party City.
Secondary Basic Steps
Step 3:
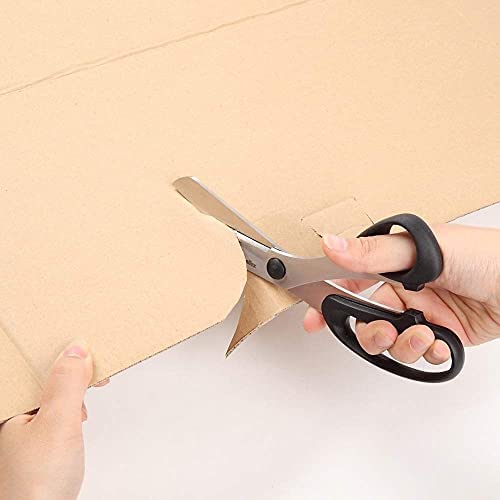
You now have your image in various pieces. It’s like a puzzle. You don’t just want to print and paste without proper order. What you have to do now is carefully cut out the unnecessary portions of your image.
You’ll see a bit of white background that comes along with the photo. Cut those areas out. After that, you’d get the full figure photo ready to land on the cardboard. Remember, don’t stick out yet.
Pick up your pen or pencil and mark the outer borders of your cutout photo. Lay the pieces down on the cardboard and ensure the images have the pattern you want.
Step 4:
It’s time to paste the image on the cardboard. Take any glue you’d like. And stick them carefully, one by one, according to the features of your image. A strong adhesive would be better. While pasting, clean out the edges from the sides of the image to make sure there’s no glue out of the border.
Step 5:
Now mark the area around the image you’ve pasted on the cardboard with your pencil or pen, and carefully cut out those areas on your cardboard according to the trace marks. That’s all. Now you have the finished cardboard cutout.
But one thing needs to be done unless you want your personalized cardboard cutout to hang on the wall. But if you want to display it at your party, wedding, or anywhere else, follow the next step.
Step 6:
Make a stand. Take a piece of firm vertical cardboard. Make it ¾ the height and 4″ wider than your subject. Please attach it to the back of your cardboard cutout. Place it at the neck end. It would give a slight lean to your personalized cardboard cutout to keep it standing correctly. Or you can place it horizontally at the bottom to give it a straight standing position.
Must considerable things to make the cardboard cutout
- The standard cardboard cutout size is 32 x 27 x 3 inches.
- Take proper measurements of the cardboard, and mark the area fold by fold (if you want to transport it).
- Take a full-body image, cropping the surrounding area as much as possible.
- Arrange the printed images in the correct series carefully.
- Attach the stand at a backward angle for free standing.
- Before pasting the image pieces, trace them on the cardboard with a later follow.
- An extra area of cardboard can be left at the bottom to serve as a stand.
So, follow all those necessary steps to make a personalized cardboard cutout. Feel free to ask any questions in the comment box.