Since you have already made a personalized cardboard cutout of yourself at home, you probably wonder if you should make a cameo Big Head of yourself. No worries, just because it looks massive doesn’t mean it is not handy or challenging to make. It is much easier and cheaper than it looks. You can have your Big Head cut off in less than 20 minutes. And it’d cost you around $10-20 for each.
Why people use Big Head cutout
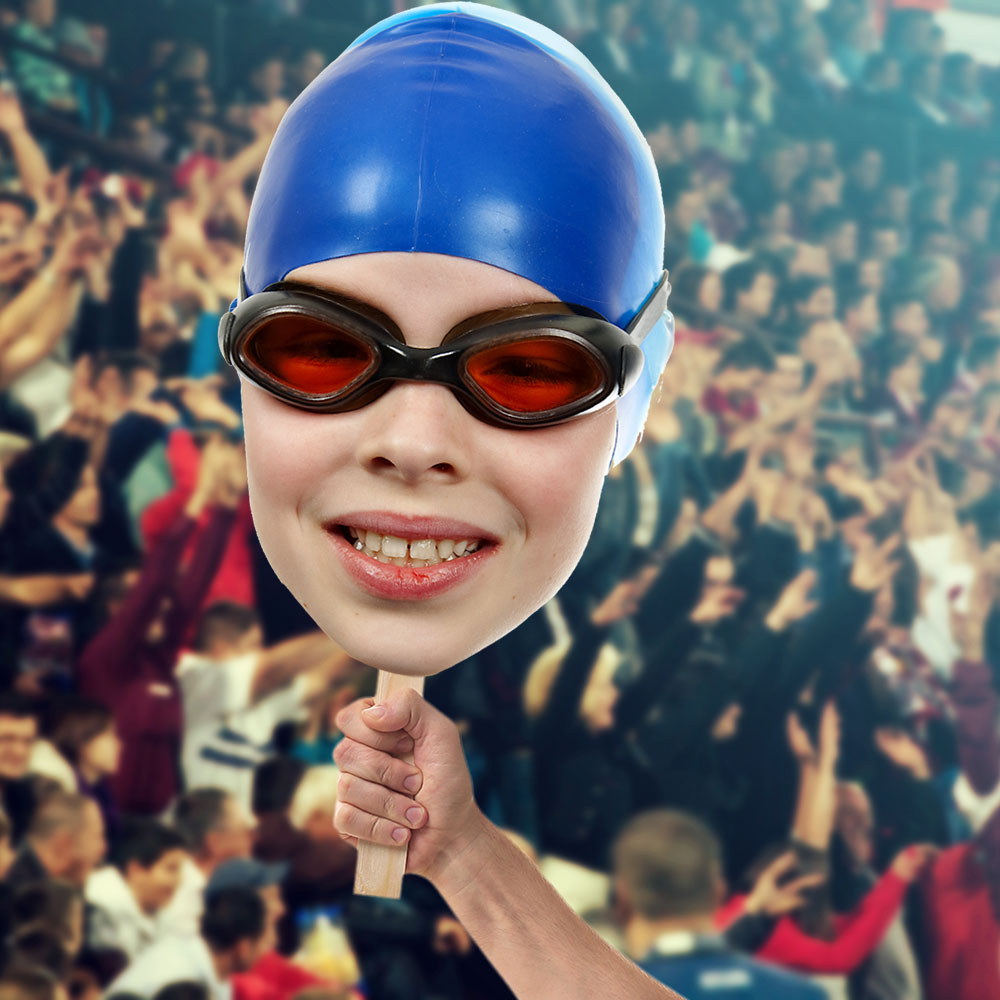
Big Head cutouts are trendy it is typically made out of plywood or cardboard. If you go out with your friends and family to watch a movie or at a stadium to enjoy a sports match, cheering for your favorite player or movie star, holding a Fathead cutout of them would make the atmosphere more uplifting.
It is not a just a funny thing to do. You can use it to show support and to bring laughter, you can even make meme cutouts for fun with your dear ones. Big Head cutouts are also amazing for wedding photo booth.
These cutouts can provide a warm vibe to the surrounding atmosphere and make a day memorable. So, are you ready to make your Giant Head for the following events, like a graduation party, wedding ceremony, or birthday party?
The steps and processes are little bit similar. But for Big Head cutout, your sole focus has to be specifically on the head area of your photo. And to start making it, all you need is essential equipment, which could be found at home (maybe you have it around already). Making this would be great fun, and you could use it for your birthday, wedding, or graduation party. So let’s get started.

Things you need
- Cardboard (you can also use plywood)
- Scissors
- Pencil
- Glue
- Tape (Optional)
- Wide, firm stick
What you’ll need to do to create your Big Head cutout
- Find high-quality photographs. Your image will come out more extensive than usual, and it has to be in high resolution for better clarity. So, if you take a picture with your phone (not recommended), set the camera settings for better results.
- Cut out your printed image with scissors. Don’t worry about the background. It would be cut off while you processed it with scissors.
- Lay it on the cardboard. Make sure your cardboard has a flat surface. Trace its outer borders with a pencil.
- Now set aside the image, and cut the cardboard following the pencil marks.
- Apply glue to the board with care and adhere to your image.
- Let it dry. Wait for a while. Make sure it is dry enough.
- After that, place a ⅓ portion of the stick on the back of your cardboard. Mark the area and apply glue to both the cardboard and the stick. Because, having a stick behind your Big Head is a plus for you. it gives you a better hold and provides you less chance to get damage.
- Put something heavy on it to get it to dry tightly and sit well.
That’s all. If you need any further assistance or discussion, you can freely comment below.
FAQs
What are Big Head cardboard cutouts called?
These cardboard cutouts are also called “Big Heads,” “Fatheads,” or “Giant Heads.”
How much do big heads cost?
If you make it at home, it’d be around $10–20, and if you order it online, it’d be around $20–25, depending on the size.
Can I custom order online?
Yes, you can place your custom order online. If you look out, you might get discount offer too.